Managing the Location List for QuickBooks Online Follow
Tallie users who track locations within QuickBooks Online (QBO) will now have the ability to run a bi-directional sync between the systems. This means locations created or managed within Tallie will be automatically populated in QBO, and vice-versa.
This article will show you, a Tallie Administrator, how to enable location tracking, as well as how to manage your locations.
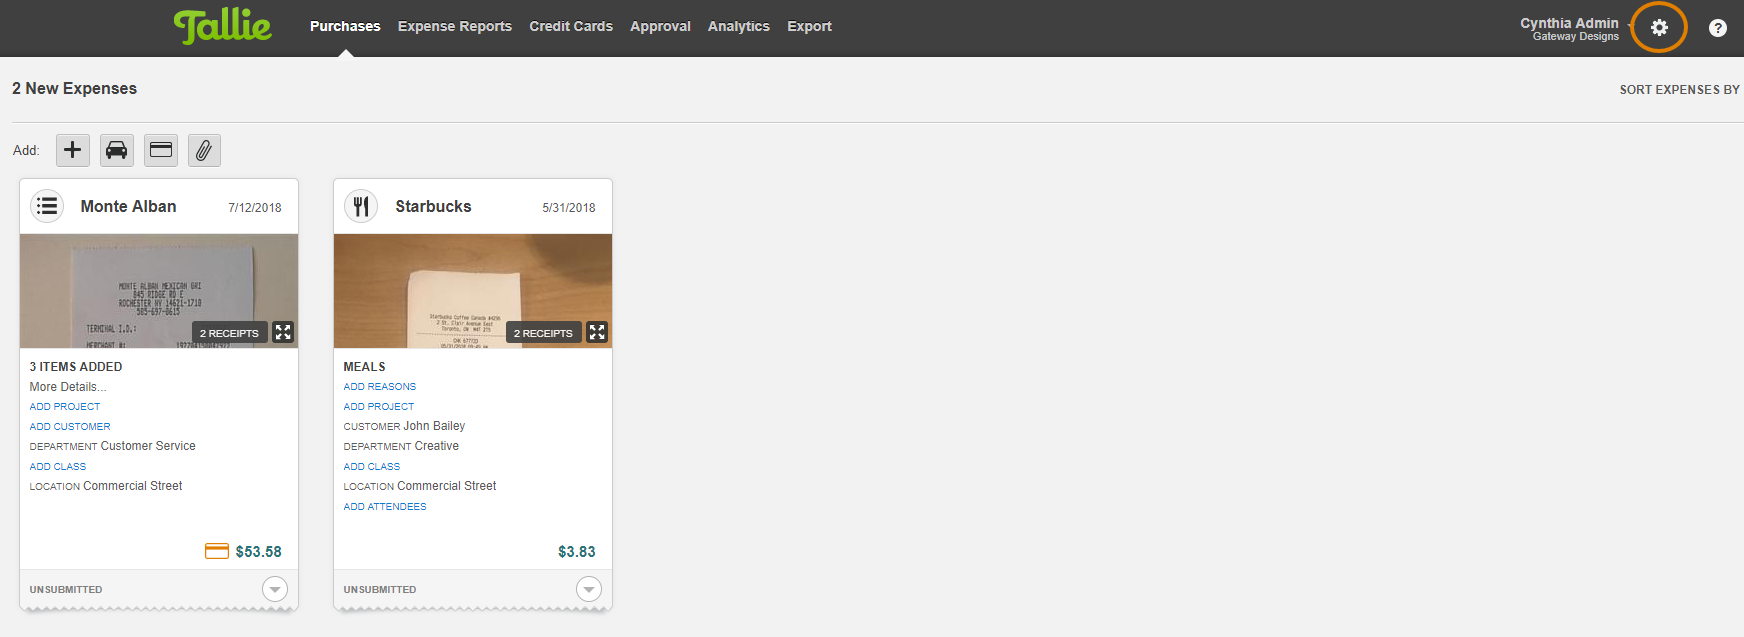
Step 1: In order for employees to begin tracking location on expenses, you'll first have to enable the Location feature. On your Tallie homepage, click the gear icon to access your Settings.
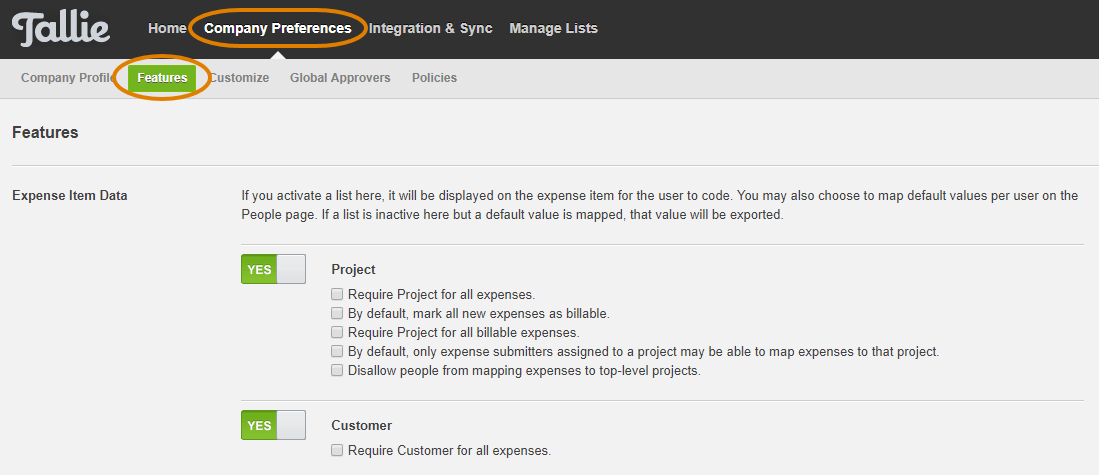
Step 2: Click the Company Preferences tab, followed by Features.
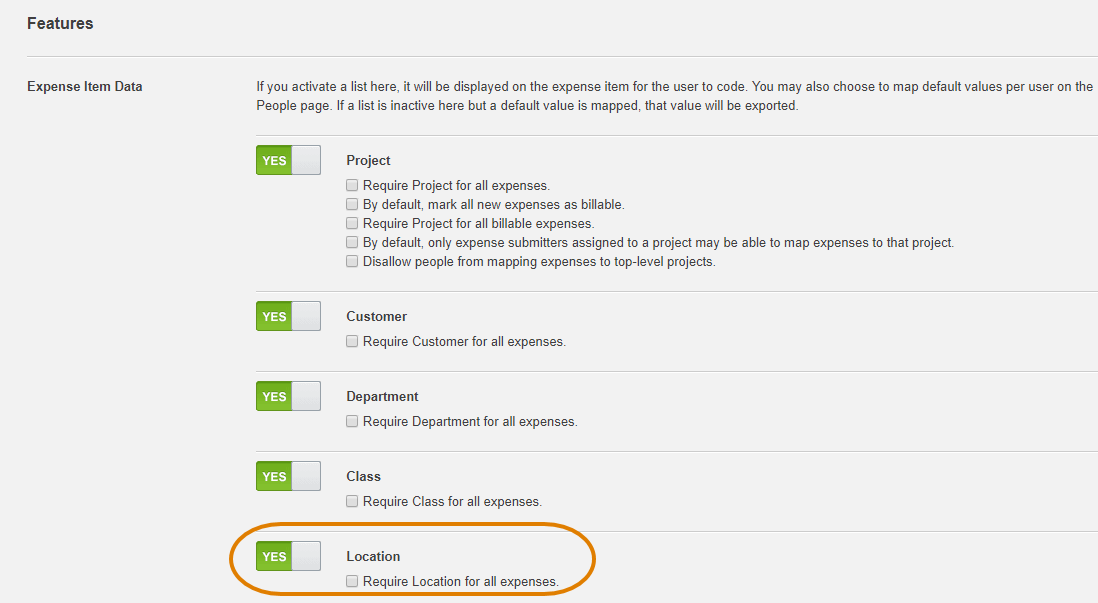
Step 3: Toggle the Locations button to YES to allow employees to track their locations.
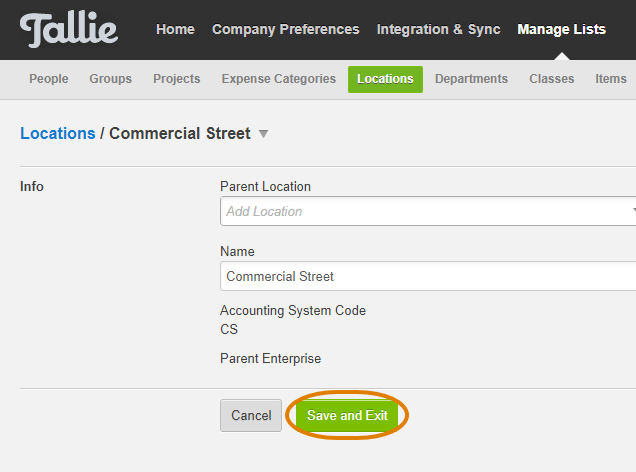
Step 4: To manage locations, click the gear icon, followed by Manage Lists. Then, click Locations.

Step 5: From here, edit your location by clicking the location name.

Step 6: Click Save and Exit when finished editing. Any changes made will be reflected in QBO within a few seconds. There is no need to manually run a sync.
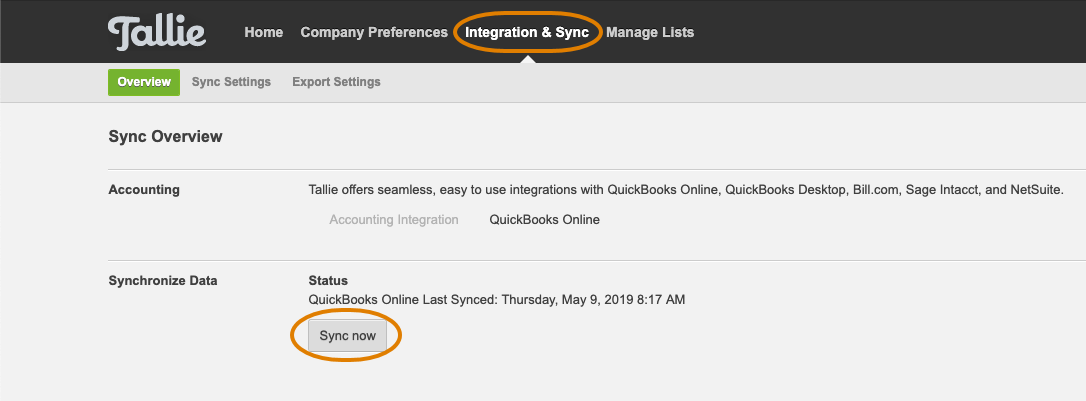
Step 7: You may also create or edit locations in QBO and click Sync Now on the Integration & Sync page in Tallie. Alternatively, the automated hourly sync between Tallie and QBO will pick up on the changes and make sure both Tallie and QBO are alligned.
Enabling Location Tracking within QBO
Step 1: If you don't utilize the location list in QBO and want to start, click the gear icon in QBO.

Step 2: Click Account and Settings.

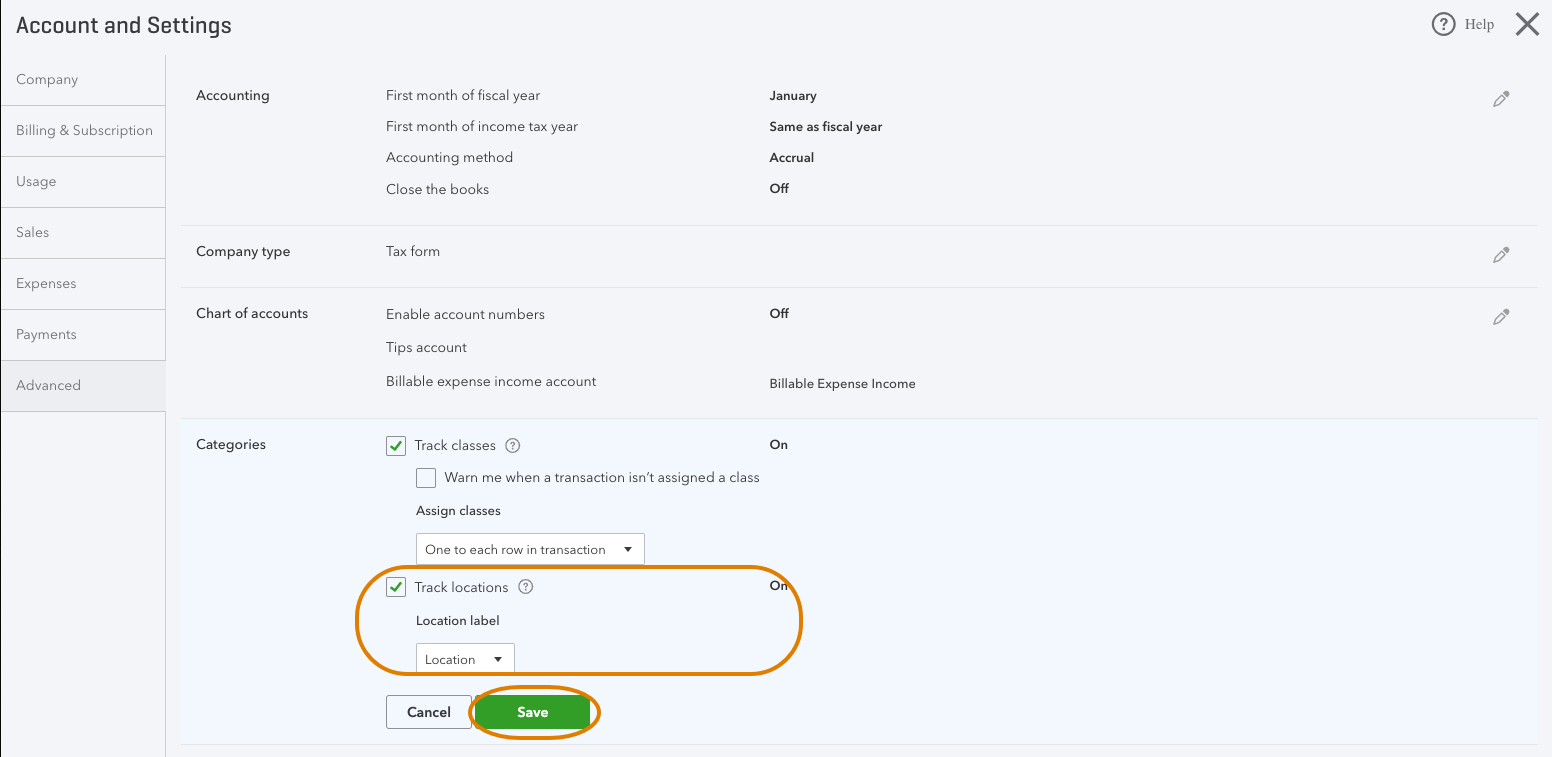
Step 3: Click Advanced. Then, under the Categories section, click the pencil icon to edit.

Step 4: Click the Track Locations checkbox. Then, click Save.
Please Note: The Location Tracking feature is only available in QBO versions (Plus and Advanced), so those on lower versions would have to upgrade their QBO in order to access it.