Using Cash Advances in Intacct Follow
A cash advance is an advance payment to an employee that covers legitimate business expenses. This article will show you the recommended process for handing cash advances when using Tallie with Intacct.
Issue an Advance in Intacct
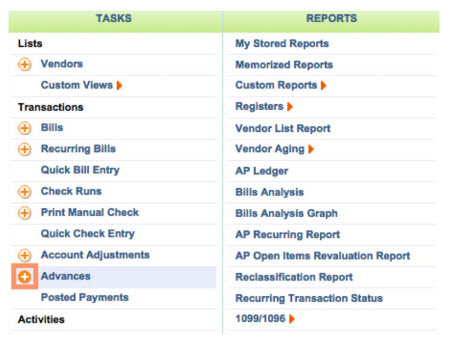
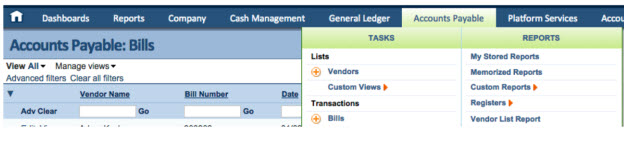
- Open Intacct and go to Accounts Payable.
- Click the plus sign next to Advances to reveal the Create Advance Payment screen.
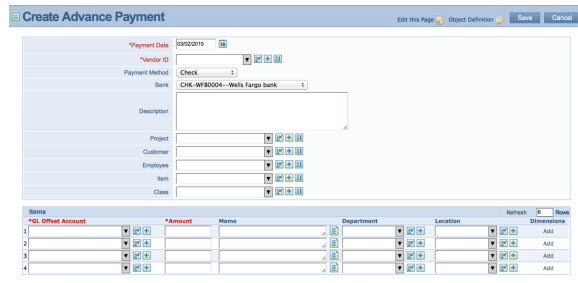
- Create the payment for your chosen Vendor. Make sure the payment is mapped to the other appropriate clearing/holding account.
Please Note: If not mapped to a specific Advances account, Intacct will use the default offset GL account. You can change the default account on the Configure Accounts Payable screen (see Company > Subscriptions > Accounts Payable > Configure.) To ensure there are no errors after you click Save, be sure to choose a balance sheet account.
- Depending on your Payment Request settings, your payment may need to be approved. Your accountant will first need to pay the bill for it to hit the account.
Create a Debit Memo
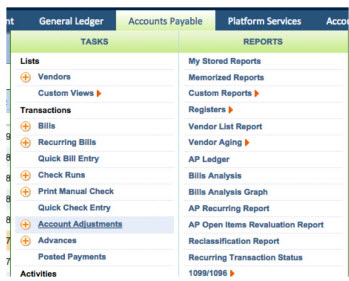
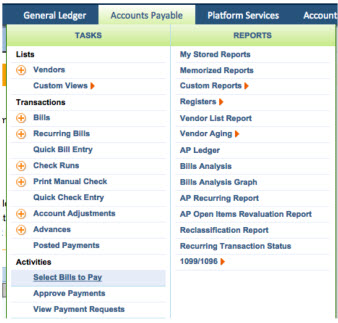
- Go to Accounts Payable and click Account Adjustments.
- Click Add and make sure the following key fields are accurate:
- The Adjustment Type is set as “Debit Memo”.
- The Vendor is associated with the user receiving the funds. This should be the same Vendor. assigned to the user under Tallie’s People > Mapping page.
- The GL Account is the same Advance or offset GL Account you mapped the advance to.
- The Amount is the same as the cash advance amount.
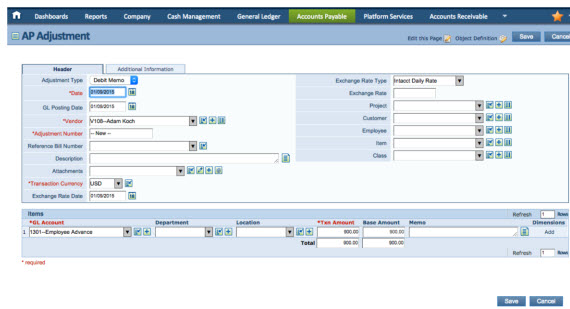
- Click Save.
Create and Pay the Cash Advance
- After your employee spends the advance, they will submit their expense report in Tallie. Once it’s approved, Tallie will automatically create a Bill in Intacct (see Accounts Payable/Bills).
IMPORTANT: Do not pay the bill before completing the next step.
Apply Account Adjustments Before Paying the Bill
- Go to Accounts Payable and click Select Bills to Pay.
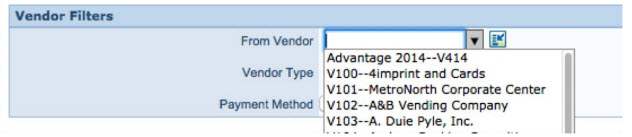
- Select the correct Vendor under the From Vendor drop-down. The Vendor should be:
- Linked to the employee in Tallie
- Connected to the Debit Memo
- Click View.
- You’ll see a list of bills alongside a list of applicable credits. Apply them to the Vendor’s bills before issuing payment.

- Input the credit amount to balance.

- Once the advance is applied against the bill created by the expense report, the employee payment is ready for reimbursement.