Opting Out of Sending Attachments in NetSuite Follow
This Tallie Integration Bundle allows users to opt into export attachment to NetSuite. Along with each AP Bill exported to NetSuite, Tallie sends a PDF file of the expense report that includes all receipts to the Communication > File area of the bill. The same PDF report is always available from the printer icon on each expense report in Tallie.
This article shows you, a Tallie Administrator, how to opt out of sending attachments in NetSuite.
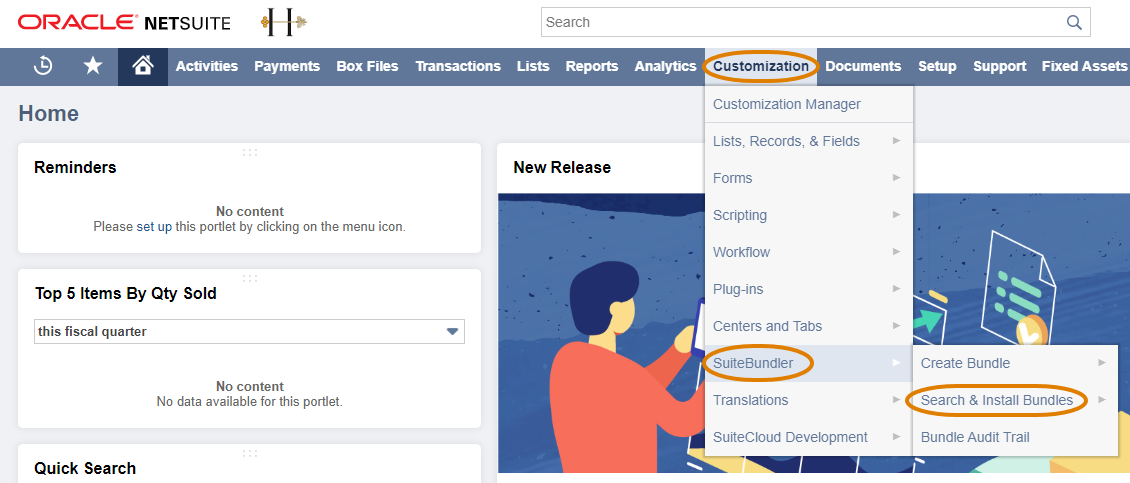
Step 1: Login to NetSuite as the administrator. Then, in the menu bar:
- Hover over Customization
- Hover over SuiteBundler
- Click Search & Install Bundles
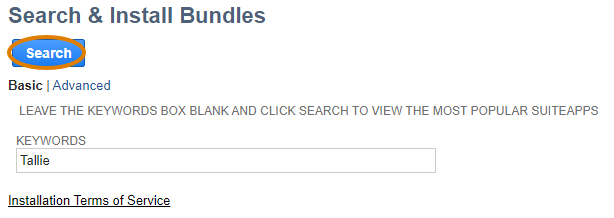
Step 2: Type Tallie into the keywords field and click Search.
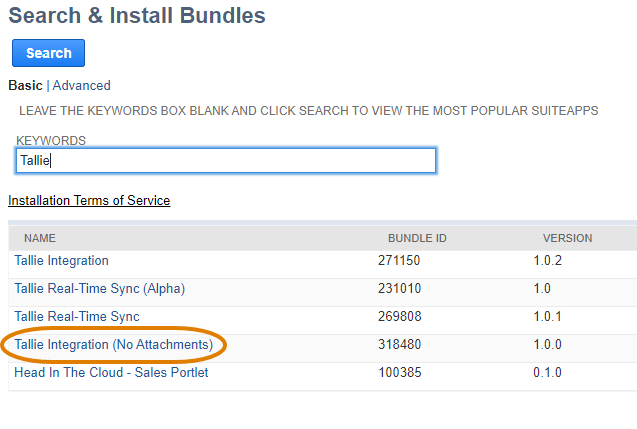
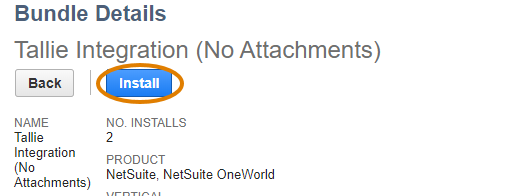
Step 3: Click Tallie Integration (No Attachments).
Step 4: Click Install.
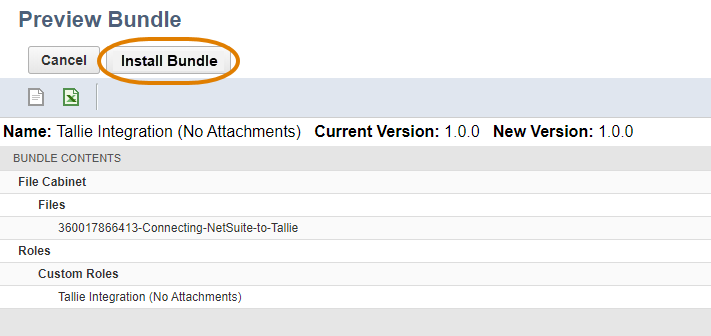
Step 5: Click Install Bundle.
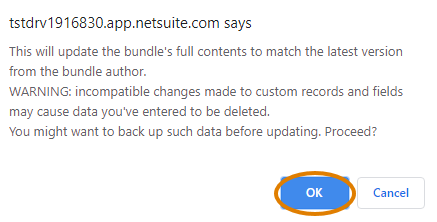
Step 6: NetSuite will ask you to confirm the installation, click OK.
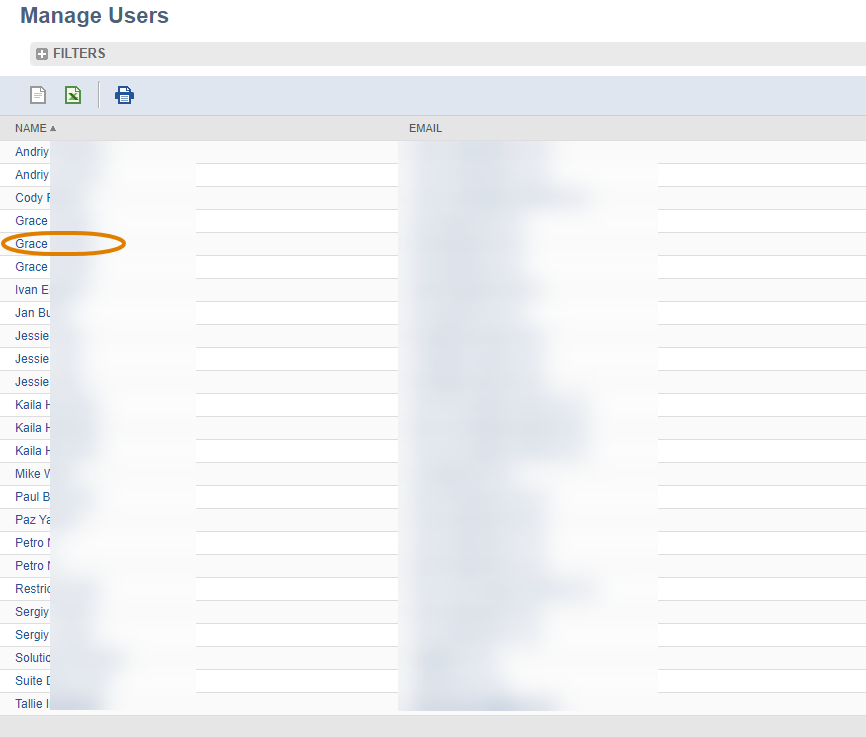
Step 7: Once the download is complete, hover over Setup followed by Users/Roles. Then, click Manage Users.

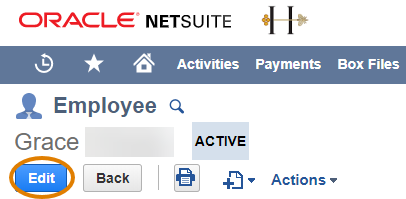
Step 8: Click the person who has been assigned the Tallie Integration role.
Step 9: Click Edit.
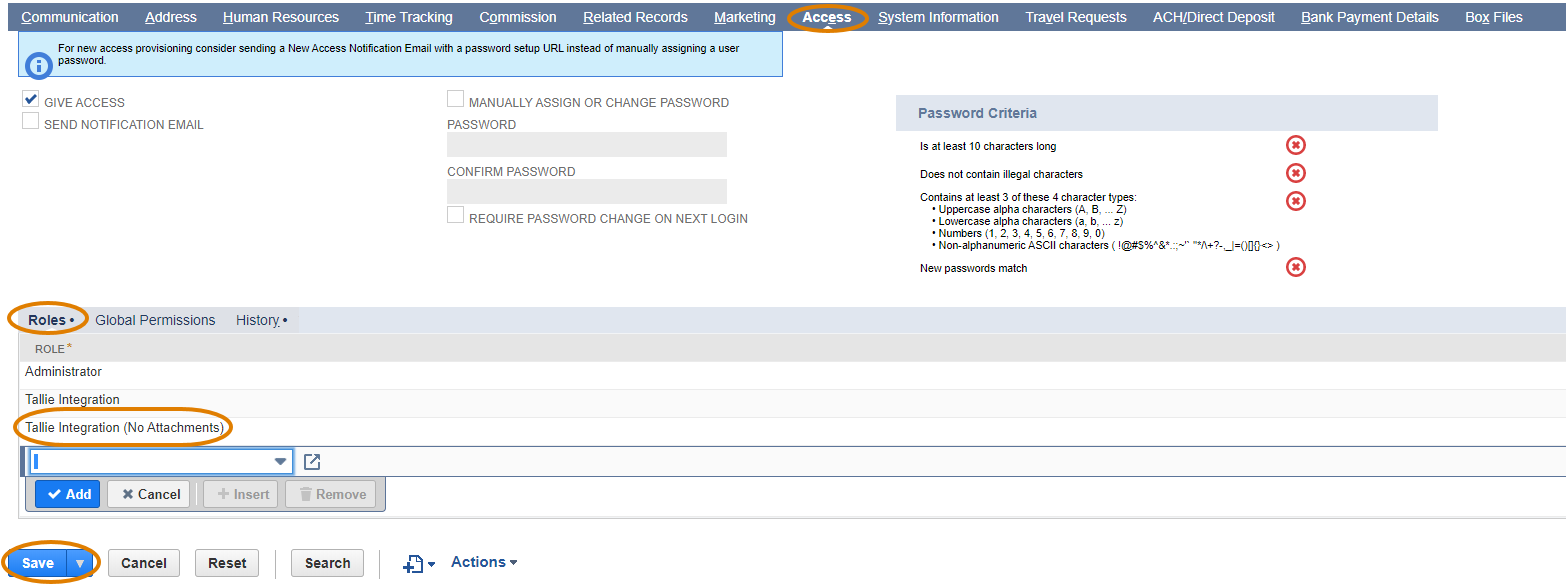
Step 10: Click the Access Tab. Then, in the Roles area click Tallie Integration and replace it will Tallie Integration (No Attachments). Then, click OK followed by Save.
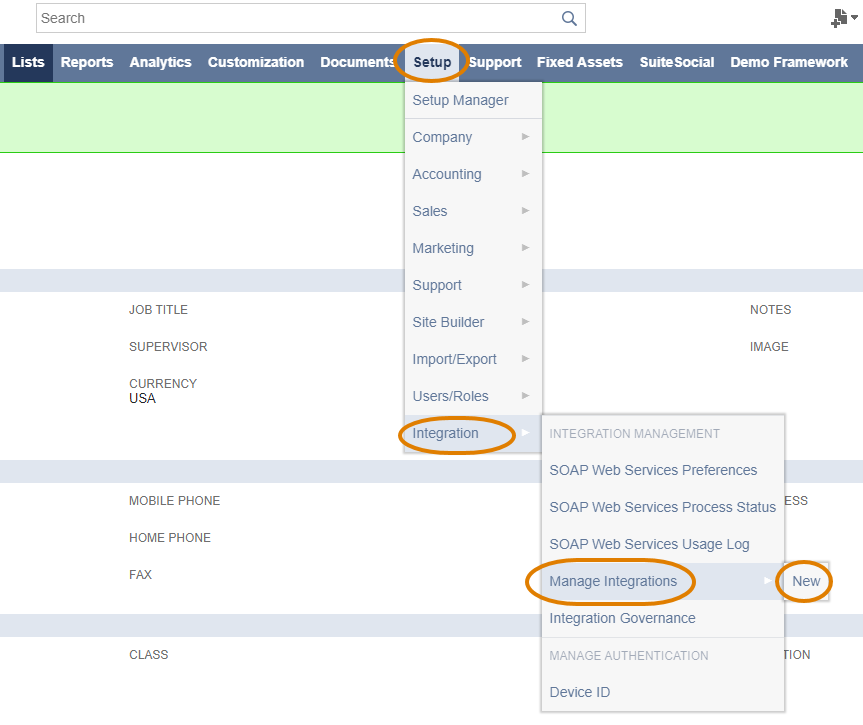
Step 11: Hover over Setup followed by Integration. Then, hover over Manage Integrations and click New.
Step 12: Use the following details to create an integration record:
- Name: Tallie Integration
- State: Enabled
- Select Token-Based Authentication (TBA) and leave everything else unselected.
When complete, click Save.

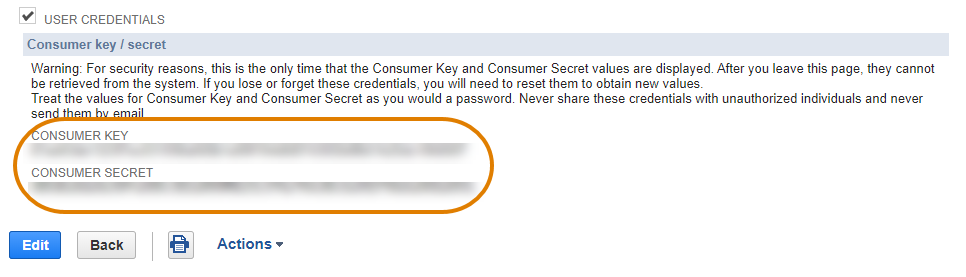
Step 13: Take note of the Consumer Key and Consumer Secret strings.
Step 14: Hover over Setup followed by User/Roles. Then, hover over Access Tokens and click New.
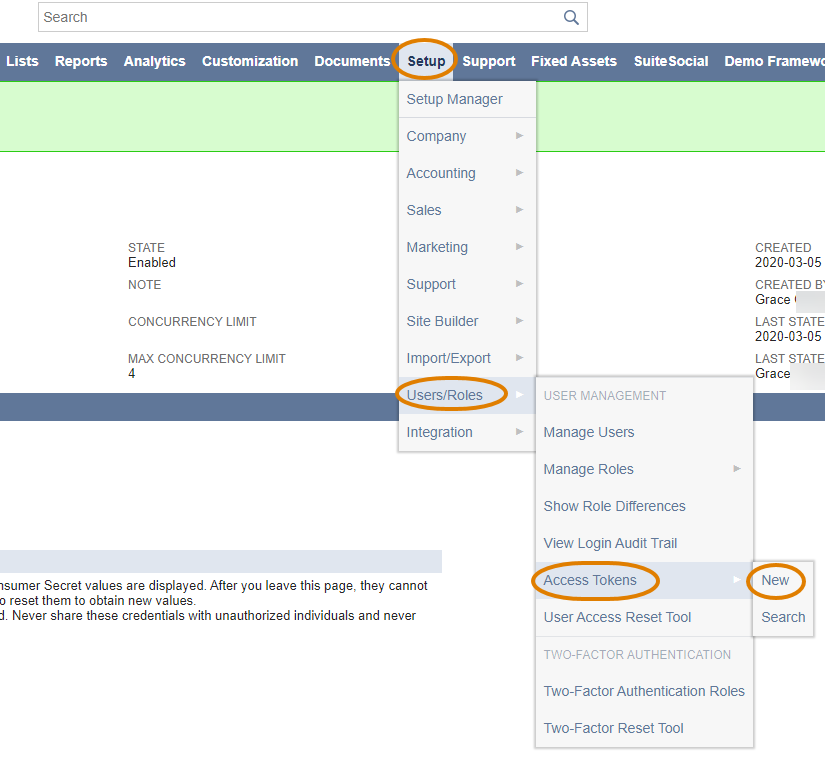
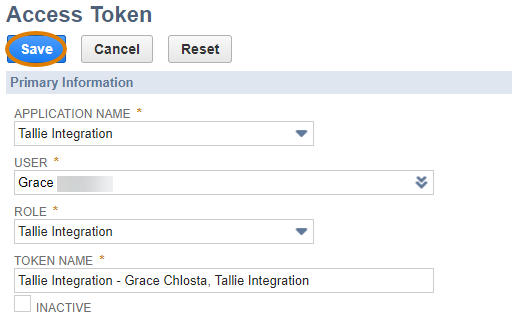
Step 15: Use the following details to create a new token:
- Application Name: Tallie Integration
- User: Any user who has been assigned the Tallie Integration role
- Role: Tallie Integration
- Leave the Token Name as is
Click Save when complete.
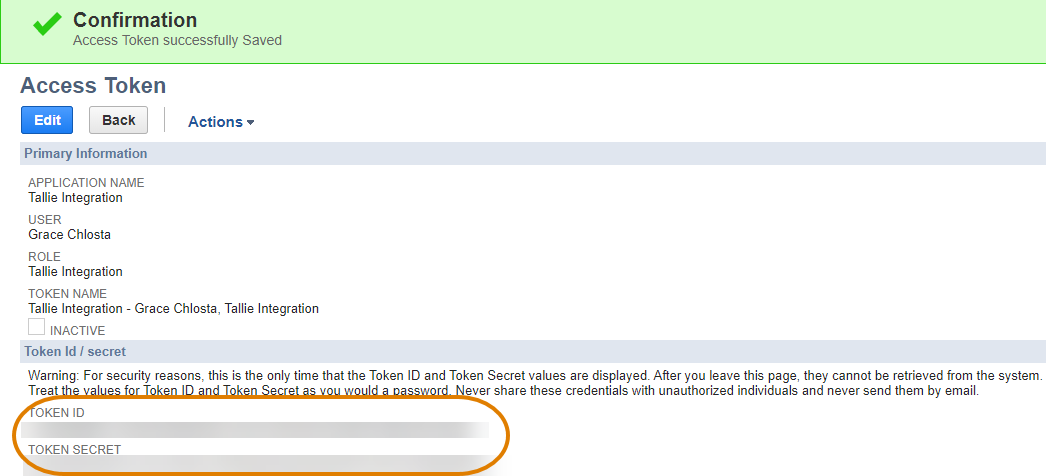
Step 16: Take note of the Token ID and Token Secret strings.
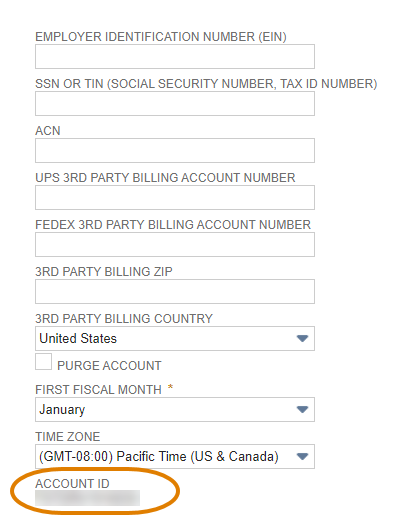
Step 17: Hover over Setup followed by Company. Then, click Company Information.
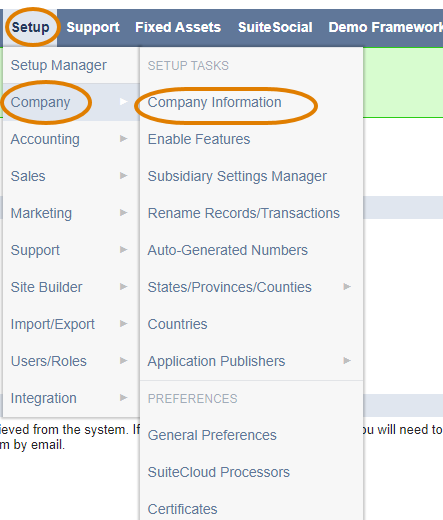
Step 18: Take note of the Account ID.
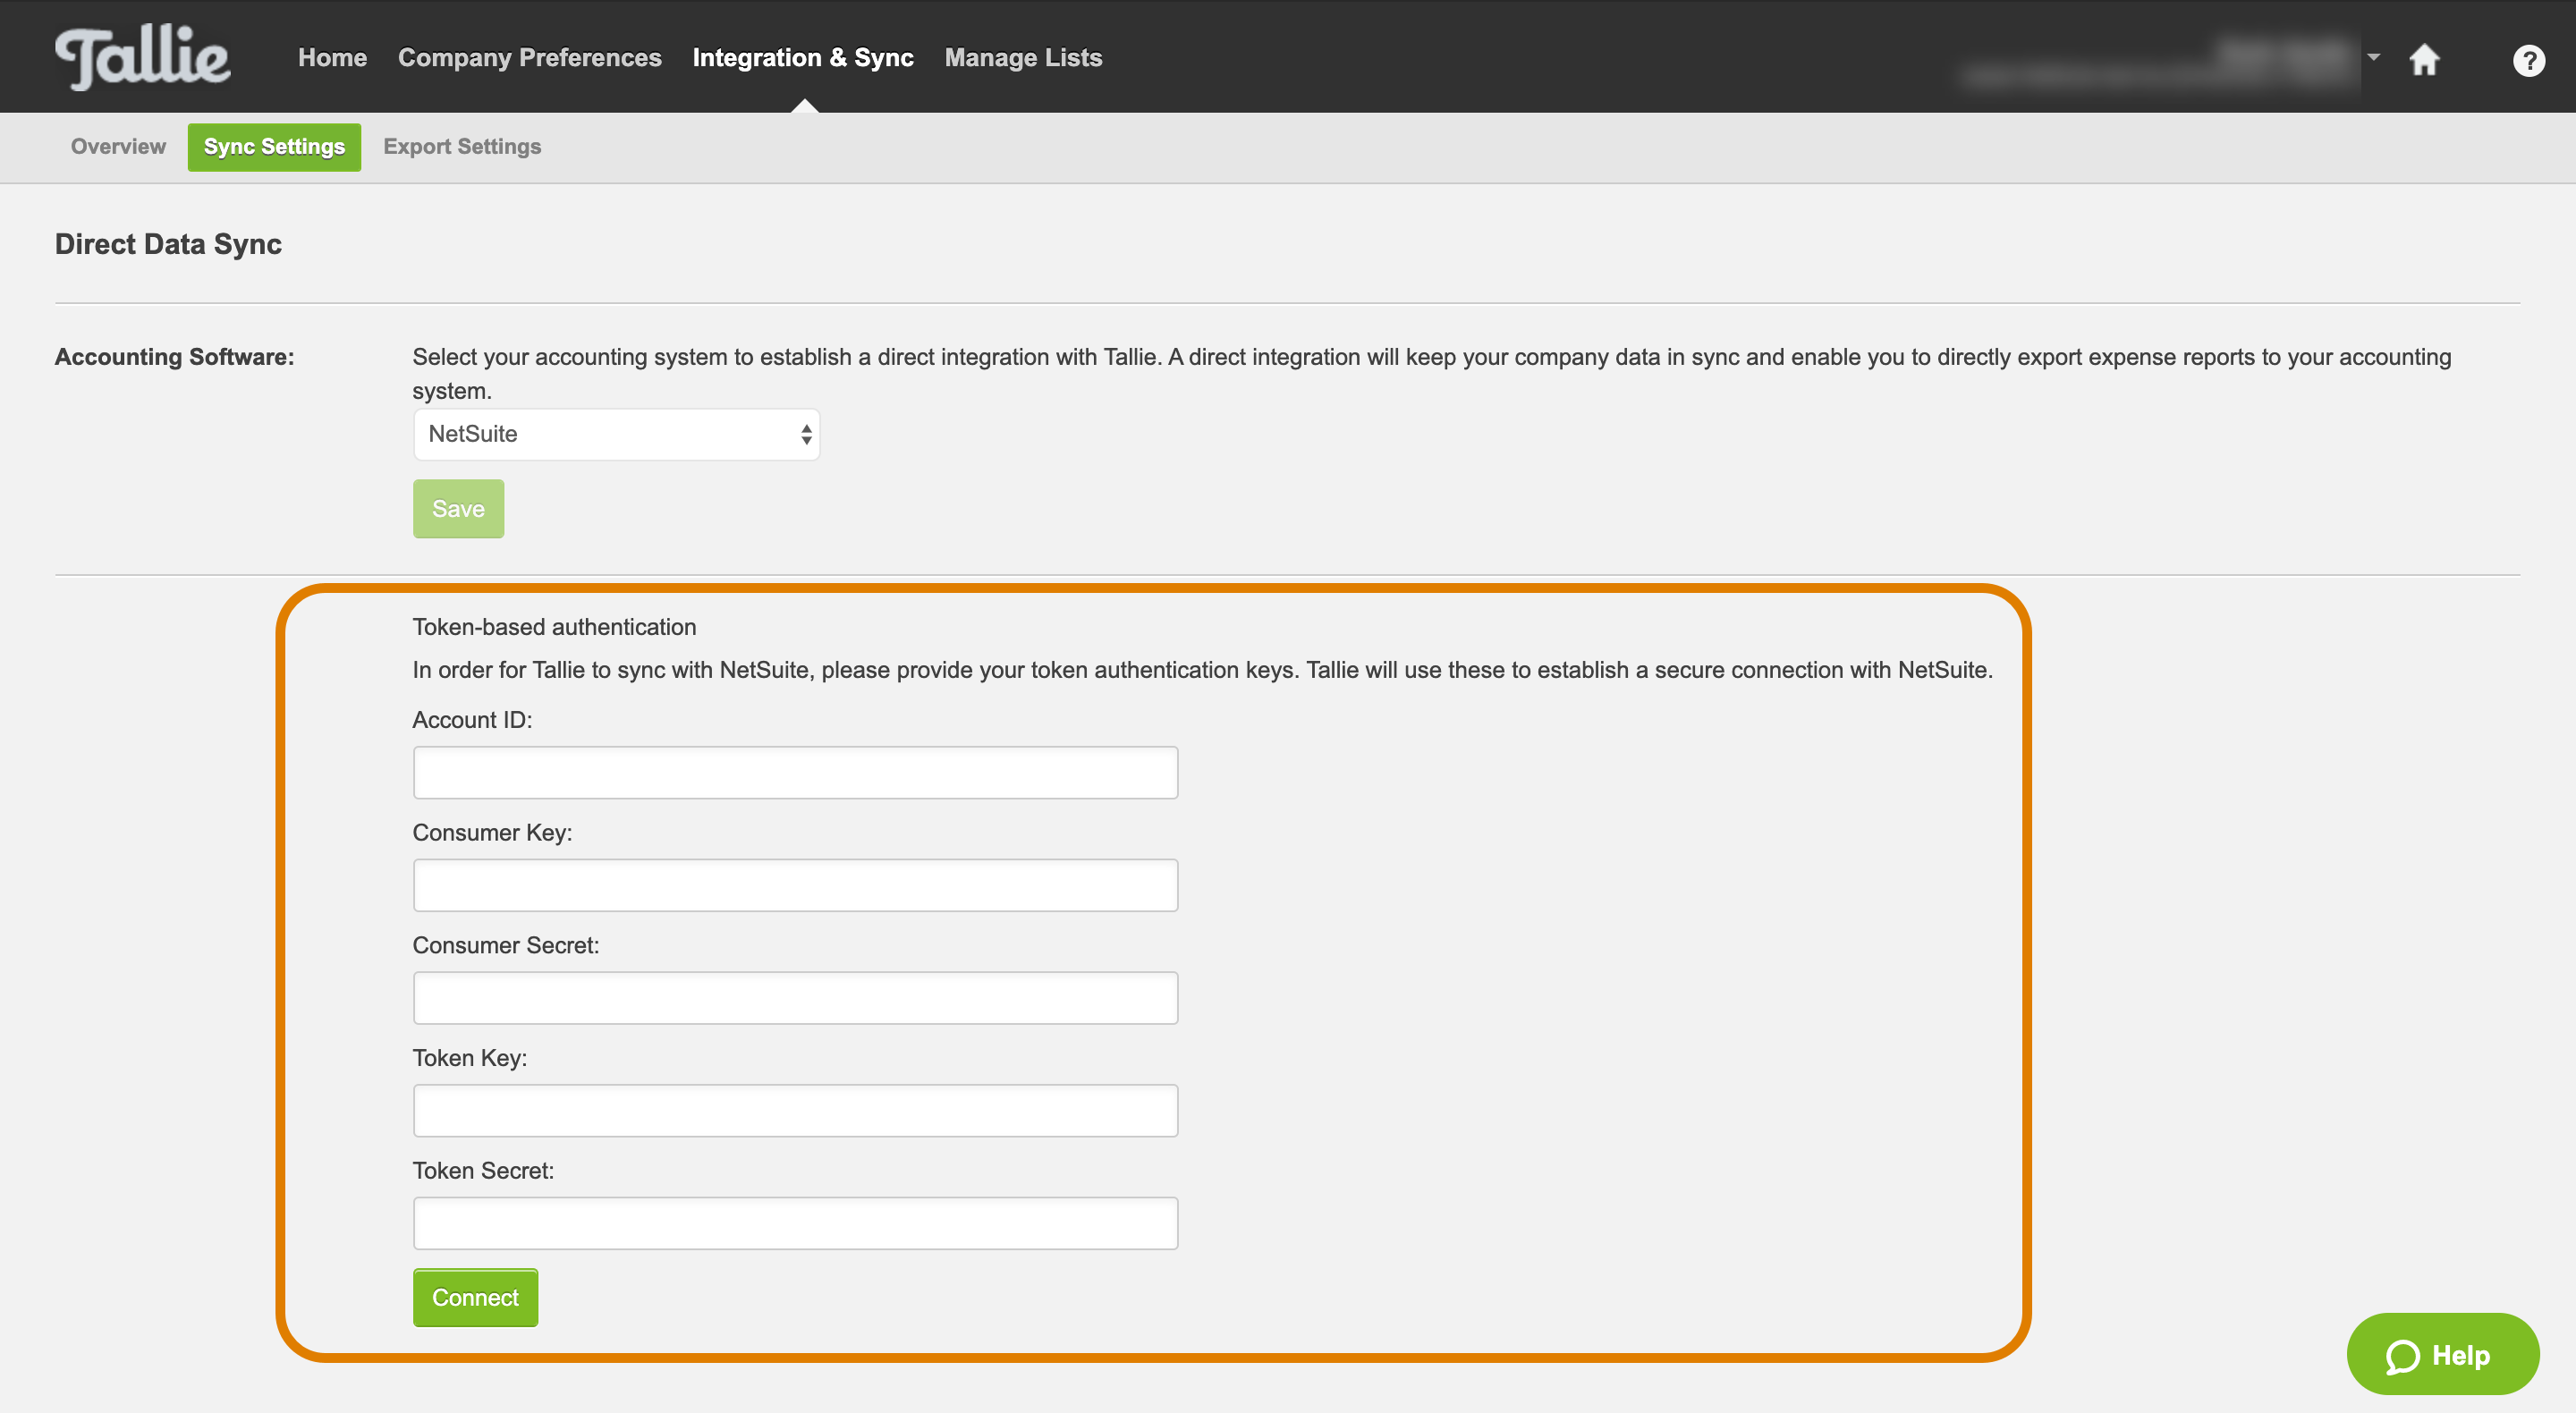
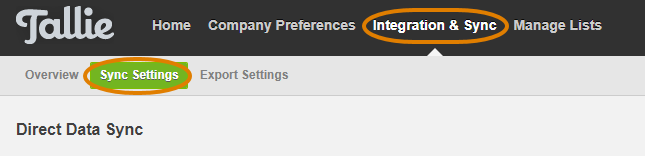
Step 19: In Tallie, go to Settings followed by Integration & Sync. Then, click Sync Settings.
Step 20: Click Update Authentication.
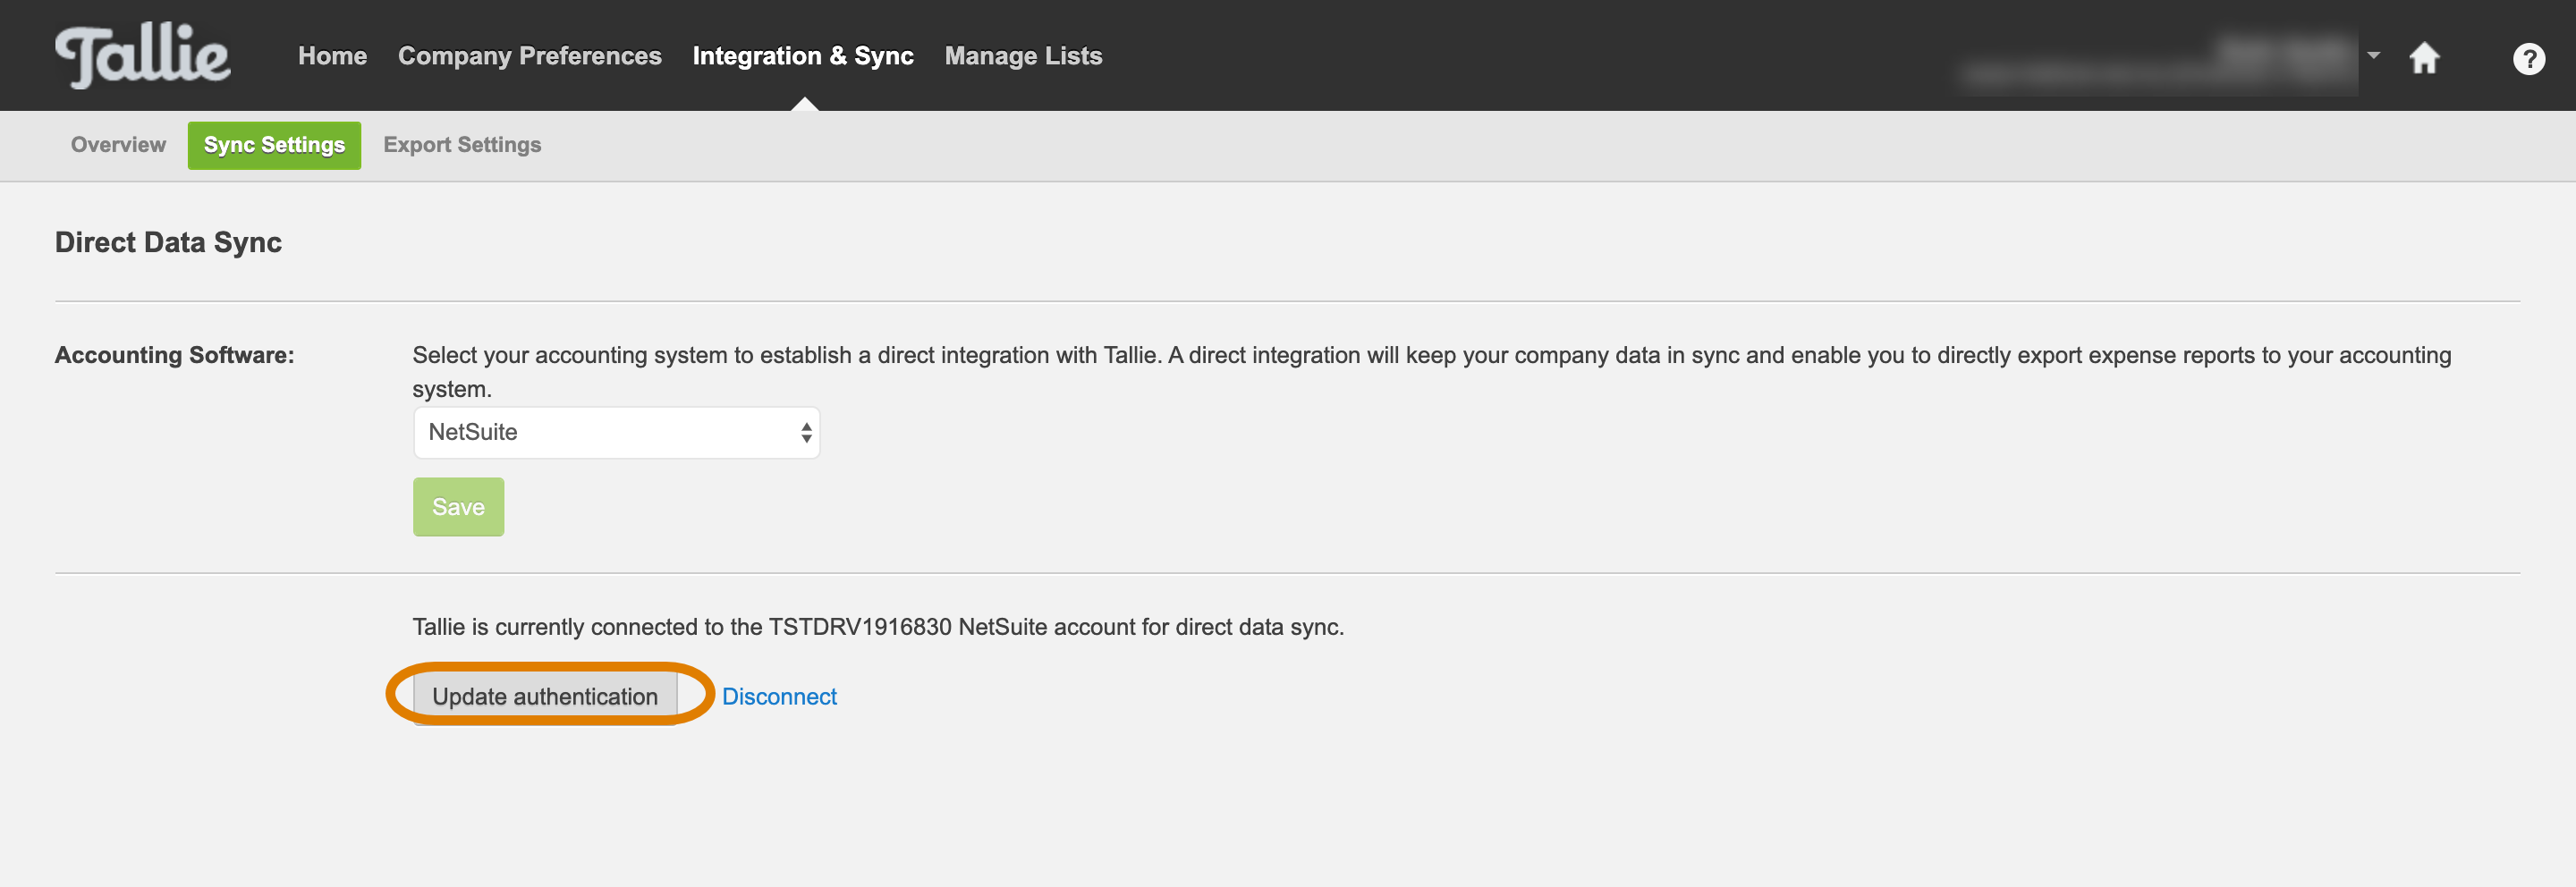
Step 21: Enter the Account ID, Consumer Key, Consumer Secret, Token Key, and Token Secret. Click Connect when complete.