Configuring FTP Import Follow
In addition to direct syncs with your accounting system and CSV uploads as options to create list data in Tallie, you may alternatively import list data from templated CSV files by uploading them to the Tallie FTP server. This article will show you how to configure your account for FTP import, download list data files, upload files, resolve errors, and configure corporate firewall settings.
Configure Your Tallie Account for FTP Import
Before you can import list data using the FTP feature, you’ll need to prepare your account for FTP import:
- Navigate to Settings > Company Preferences > Features.
- Toggle FTP Import to YES and click Save.
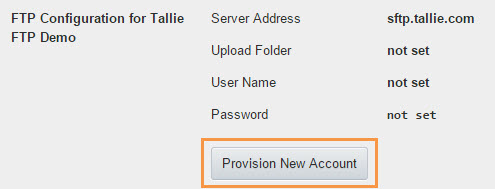
- Under Integration & Sync, you’ll find a new tab titled “FTP Import Settings.”
- Within that tab, click Provision New Account and Tallie will generate a set of credentials for you.
Download & Populate List Data Files
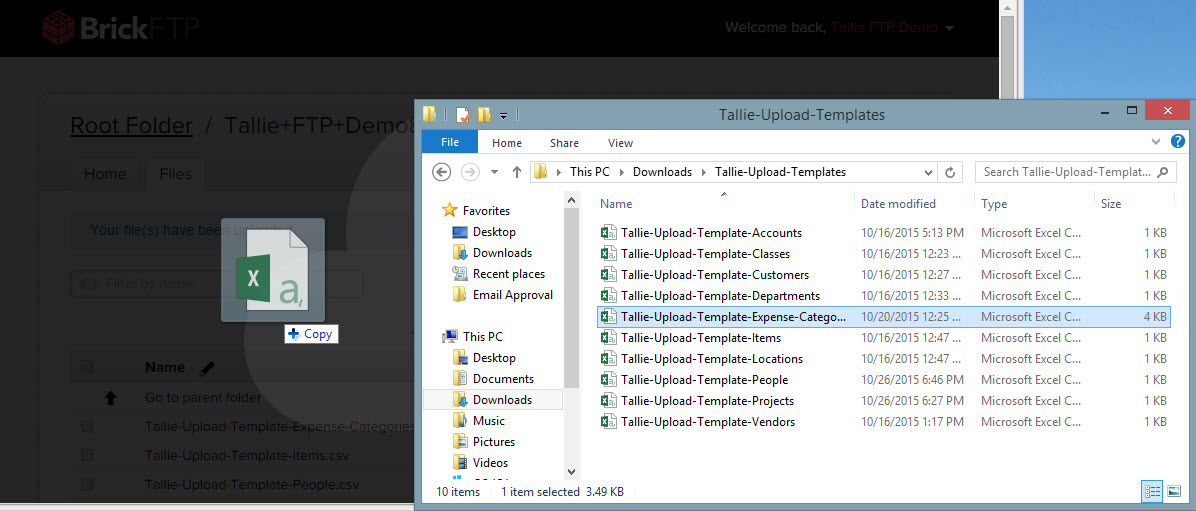
Templated CSV files for each list are available for download from the FTP Import Settings page. Read the instructions on the FTP Import Settings page carefully before you populate the files. Refer to the list of options in Tallie for drop-down fields such as “Person Type” and “Account Type.” Here are some list-particular guidelines to follow:
Expense Categories:
- Start Date/End Date fields must be populated in short date format, e.g. 1/1/2015
People:
- All people uploaded via FTP have “Track Expenses” enabled by default. Enter “Yes”, “Y”, or “1” in the permission columns to give the user those permissions. Simply leave blank if the user won’t be needing those.
- How the numerical references correspond between Tallie People list and the upload template:
| People Import Template | People Detail View in Tallie |
|---|---|
| Payroll ID | Payroll ID |
| Employee XID | Accounting System Code |
| Employee ID | (Under Development) |
Upload Files via FTP Web
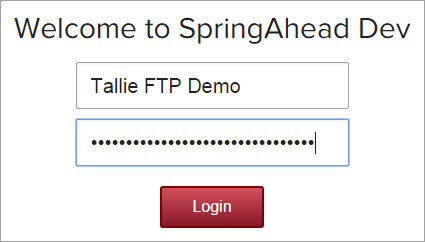
- Open a new tab in your browser. Copy the Server Address from the FTP Import Settings page and paste it into the new tab’s URL bar.
- Login using the credentials provided on the FTP Import Settings page.
- Click the Files tab.
- Drag a saved CSV into the BrickFTP browser tab. A progress indicator will appear.
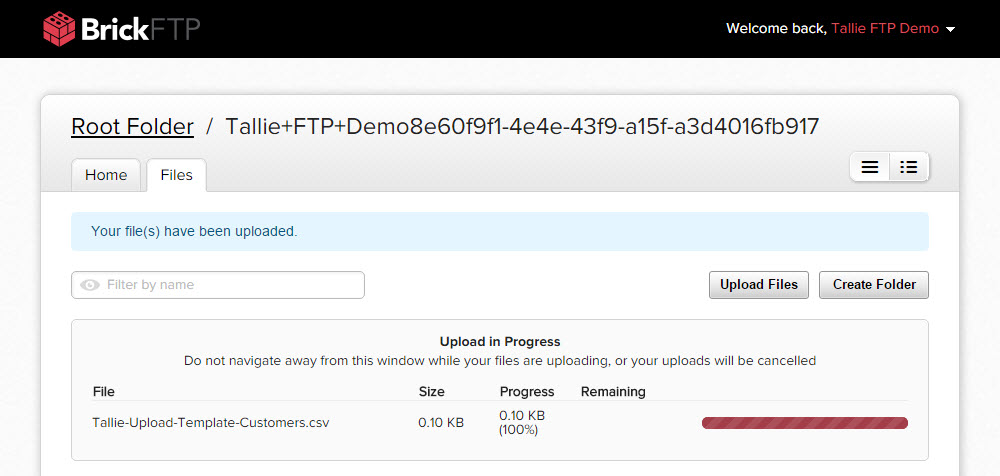
- Wait a few seconds after the progress indicator reaches 100%, and navigate to the Manage Lists area in Tallie to review the newly-imported data.
- Files that have been successfully imported are removed from the BrickFTP Files tab upon a page refresh.
Upload Files via FTP Client
Use your preferred FTP client, or download WinSCP and follow the instructions below to configure it:
- Launch the FTP application on your computer.
- Select SFTP in the File Protocol field.
- Copy the Server Address from the FTP Import Settings page into the Host Name field.
- Login using the credentials provided on the FTP Import Settings page.
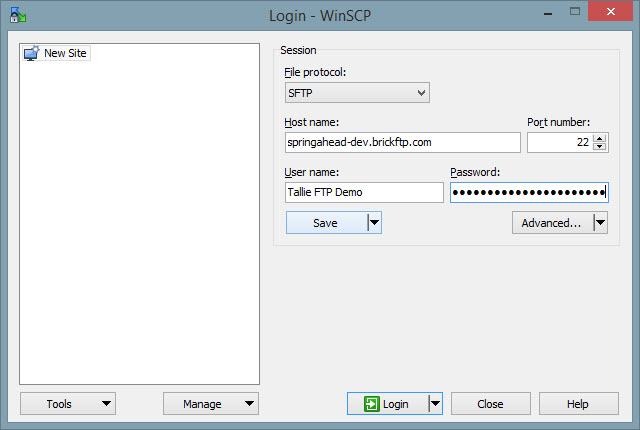
- Once the session starts, drag a saved CSV into the FTP application window.
- Please Note: Upload method for each FTP application may vary. Refer to your preferred FTP application’s documentation for specific instructions.
- Wait a few seconds after the success message appears, and navigate to the Manage Lists area in Tallie to review the newly-imported data.
- Click the “Refresh” button in your FTP client to clear all files that have been successfully imported to Tallie.
Resolve Import Errors
If the list entities you imported don’t show up in Tallie, follow the steps below to troubleshoot:
- Navigate to Settings > Home.
- Look for a blue banner that reads “You have synchronization errors” and click to view the errors.

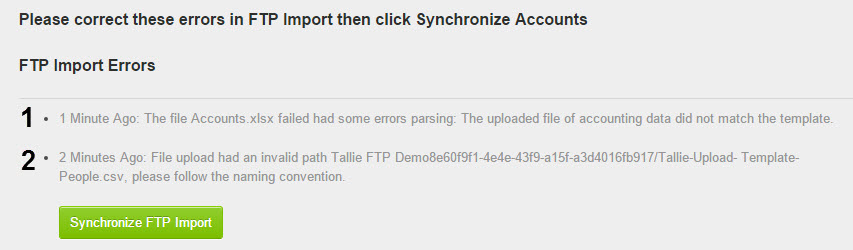
- For error #1, ensure your file is in .CSV format. Excel workbook (.xslx) and other file types are not supported.
- For error #2, ensure your file name complies with the naming convention, which begins with “Tallie-Upload-Template-“ followed by the name of the list. If it does, re-save the file and try again.
- Once you’ve corrected the file, import the updated version via FTP Web or FTP client again.
- Click Synchronize FTP Import and the errors will be cleared.
For users in locked-down corporate environments, you may not have the correct ports open in your firewall for WinSCP or other FTP clients to work. You will need to have your System Administrator configure your firewall settings according to the firewall details below:
Outbound ports 80,443,21,990 and 40000-50000 need to be open for the connection to work.
If you prefer to not open these ports globally but whitelist access for certain IPs, they are as follows:
34.233.183.131
54.172.162.210
34.193.60.221
34.194.175.247
34.204.145.250
34.204.150.23
34.204.153.236
34.204.236.250
34.204.250.40
34.205.137.182
34.206.140.166
52.8.210.89
52.17.96.203
52.18.87.39
52.20.236.84
52.23.22.134
52.28.101.76
52.29.176.178
52.44.29.99
52.56.167.16
52.56.197.159
52.64.2.88
52.64.6.120
52.68.4.44
52.74.166.120
52.74.188.115
54.64.240.152
54.193.65.189
54.193.69.72
54.193.69.198
54.193.69.200
54.207.27.239
54.208.20.30
54.208.63.151
54.209.91.52
54.209.222.205
54.209.231.99
54.209.231.233
54.209.242.244
54.209.246.217
54.232.253.47
Finally, once you think you have the ports open, use this test page to verify your firewall settings: http://test.brickftp.com/