Using Cash Advances for QuickBooks Follow
A Cash Advance is an advance payment to an employee that covers legitimate business expenses. This guide outlines the recommended process for handling cash advances when using Tallie with QuickBooks Desktop/QuickBooks Online. This article will show you how to create a Cash Advance account, record a Cash Advance in QuickBooks, and deduct/offset Cash Advance balances once expenses have been imported into QuickBooks.
Create a Cash Advance Account in QuickBooks:
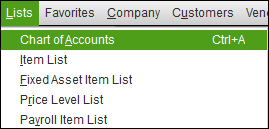
- Open the Lists menu and click Chart of Accounts.
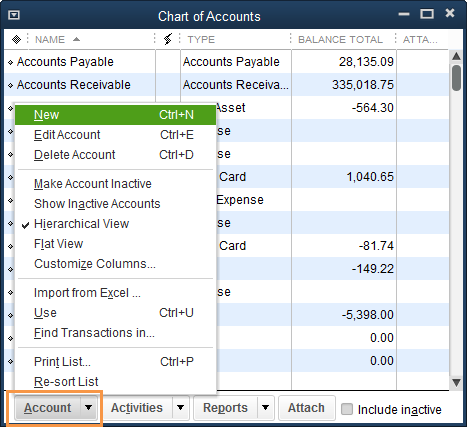
- Click the Account button in the lower-left corner and click New.
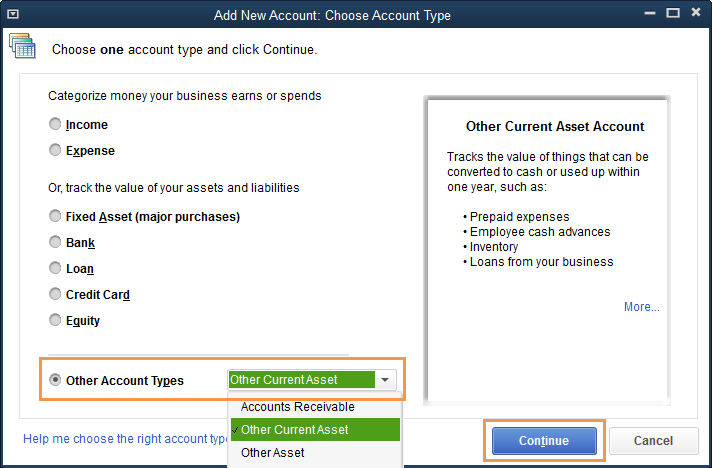
- Select Other Account Types, choose Other Current Asset, and then click Continue.
- Complete the details for your account. We recommend naming it “Employee Cash Advance."
- Click Save when completed.
To create a cash advance account in QuickBooks Online:
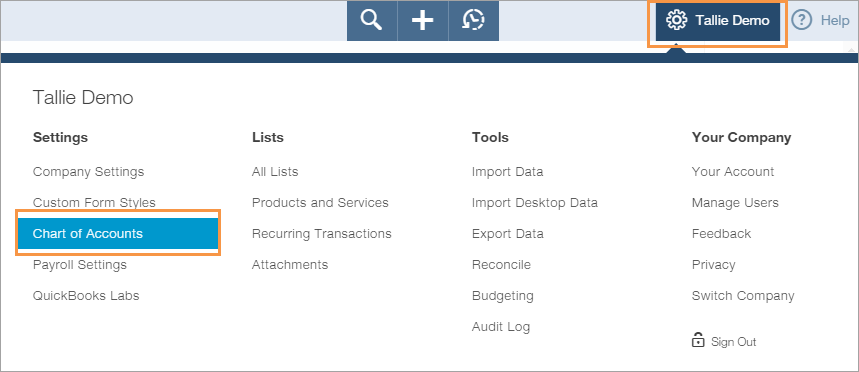
- Click the gear icon in the upper-right corner.
- Under Settings, click on Chart of Accounts.
- Click New in the upper-right corner.
- Category Type = Other Current Asset
- Detail Type = Prepaid Expenses
- Name = Employee Cash Advance (recommended)
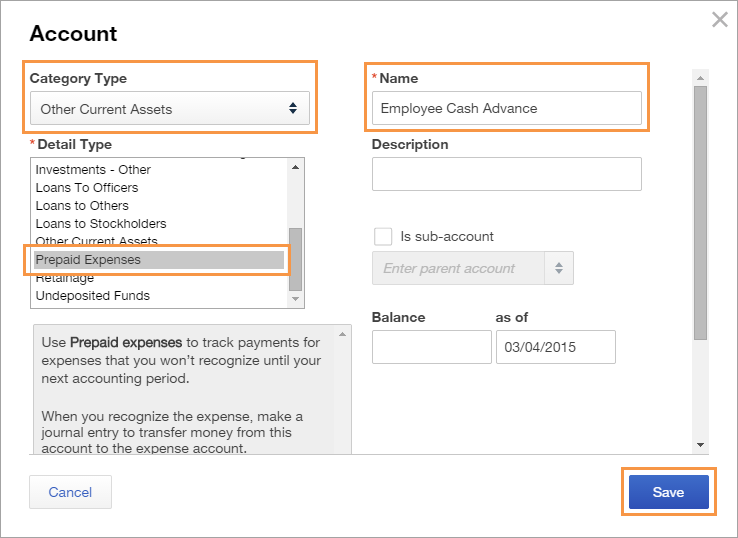
- Click Save when completed.
Record a Cash Advance
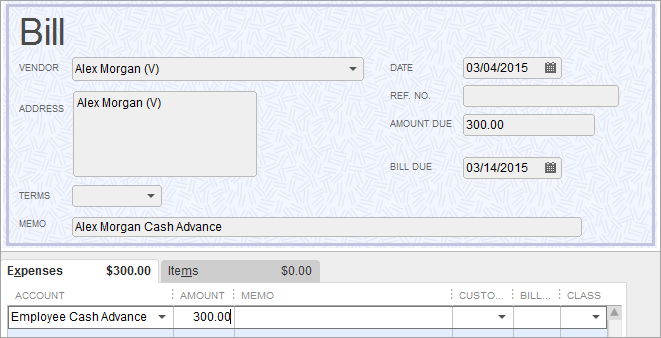
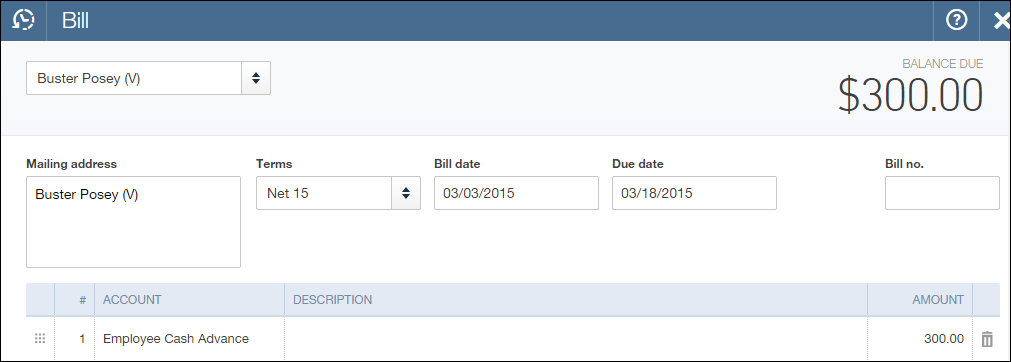
To record a cash advance, first create a bill in QBD/QBO and enter the following:
- Vendor = Employee’s vendor name
- Account = Employee Cash Advance
- Amount = Cash advance amount
- Memo = [Employee Name] Cash Advance
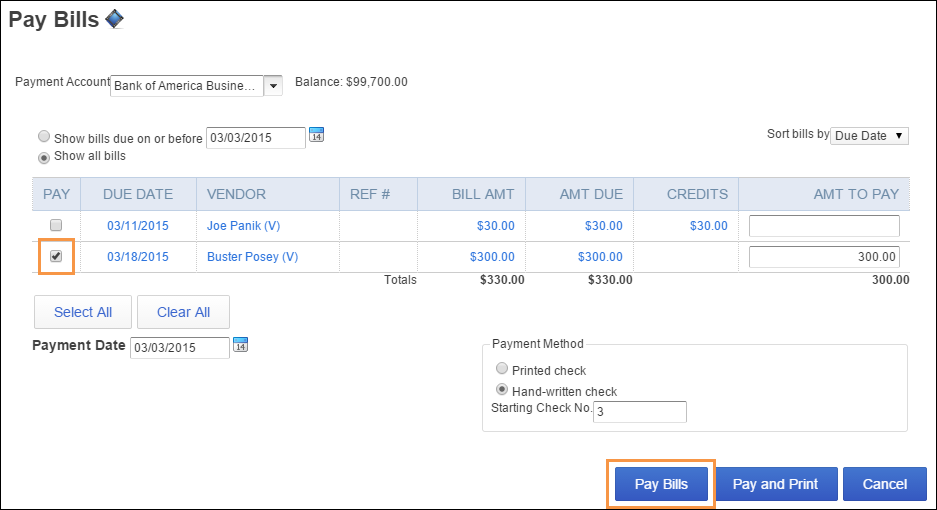
- Pay the bill to cut the check
QBD:
- Click the Vendors menu
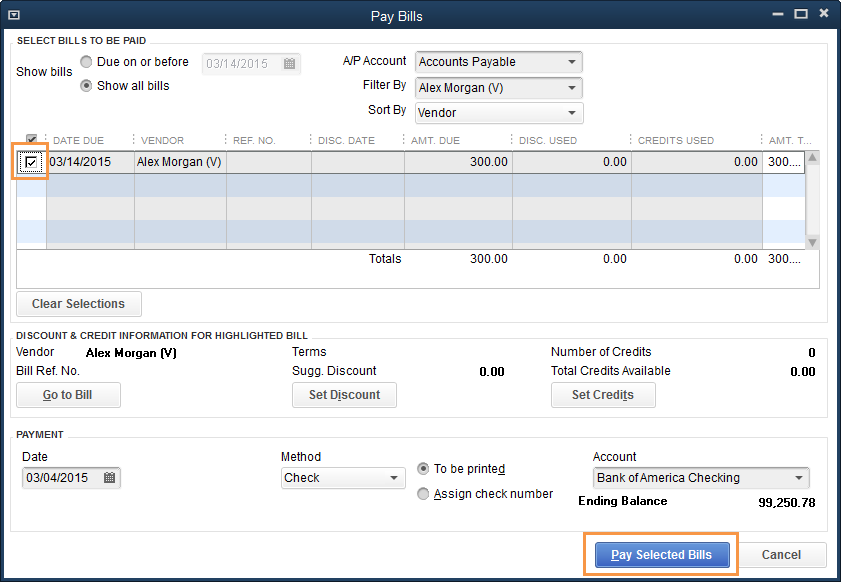
- Click on Pay Bills
- Check the box next to your newly created bill
- Click the Pay Selected Bills button
QBO:
- Click on the plus sign
- Under Vendors, click on Pay Bills
- Check the box next to your newly created bill
- Click Pay Bills
Create a Credit
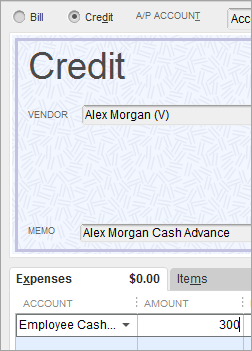
- QBD: Vendors > Enter Bills > select Credit
- QBO: Plus sign > under the Vendors header, click on Vendor Credit
- Vendor = Employee’s vendor name
- Amount = Cash advance amount
- Account = Clearing Account
- Memo = [Employee Name] Cash Advance
Check Your Work:
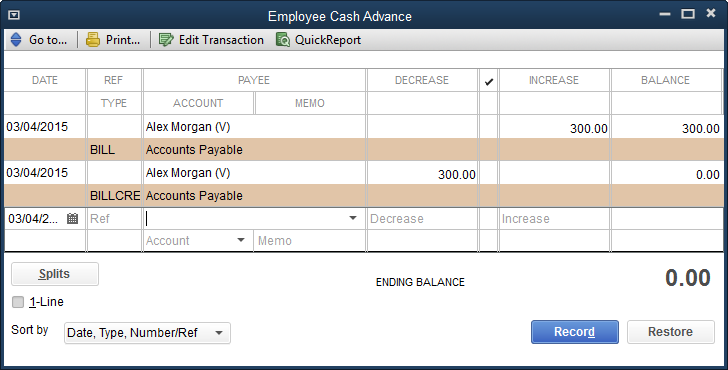
- Go to Chart of Accounts and view the Employee Cash Advance account.
- Make sure that the Bill and Vendor Credit are both present.
- The account should have a zero balance.
Apply Cash Advance Towards Employee's Expense Reports
Once the employee’s expenses have been exported to QBD/QBO, follow the steps below to apply the debit memo towards the user’s reimbursement.
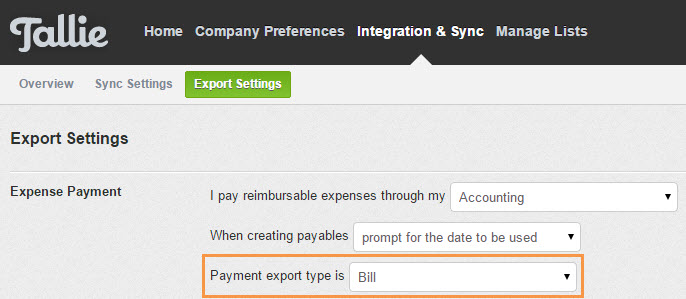
- In Tallie, configure your settings to export reimbursements as bills.
- Go to Settings
- Click on Integration & Sync
- Click on Export Settings
- Select payment export type: Bill
- Save
- Export an expense report normally.
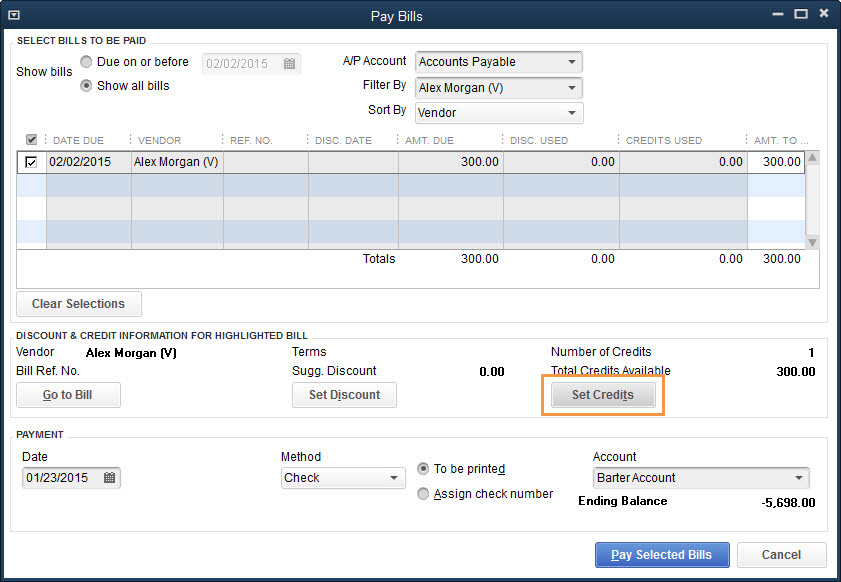
- Once the bill has been exported to QuickBooks, go to Pay Bill
- For QBD:
- Pay Bill
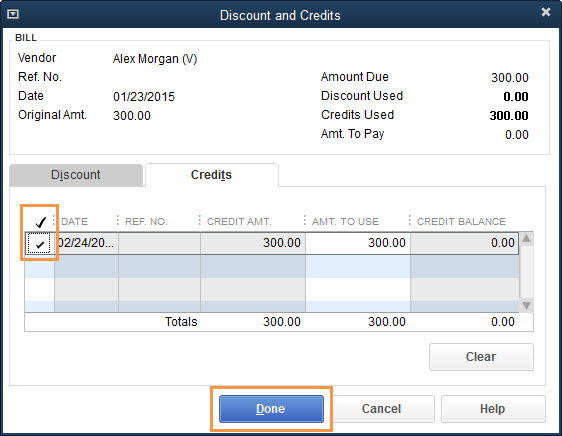
- Set Credit
- Select a credit and click Done
- Click on Pay Selected Bills
- For QBO
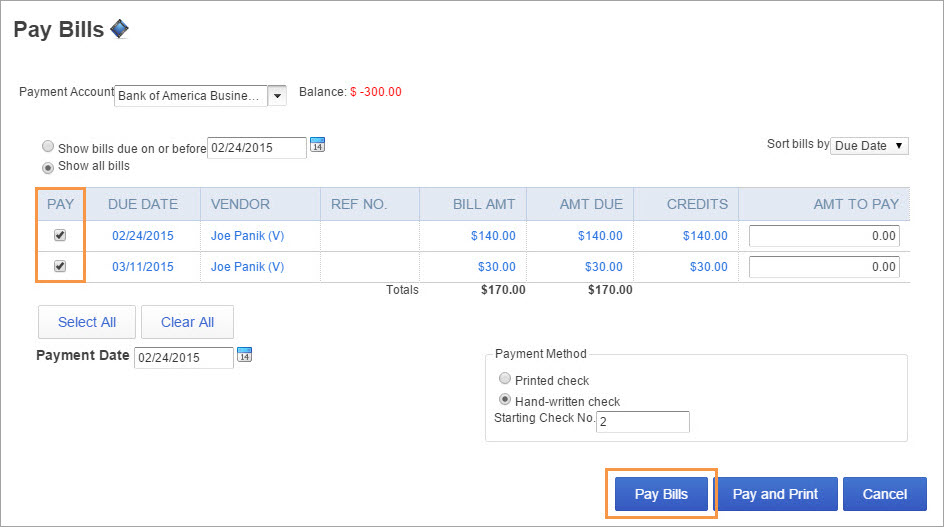
- Plus sign
- Pay Bills
- Select the bills you wish to pay.
- Click on Pay Bills and any available credits will be applied automatically.
Please Note: If your employee spent more than the total cash advance, the excess will be paid with the bill. If your employee spent less than the total cash advance, the remaining credits can be kept to use later.