Merging, Itemizing, and Mass Editing Expenses Follow
There are multiple ways to edit your expenses in Tallie that will make submitting your expense reports easier. You can edit multiple expenses at once, merge expenses together, and itemize expenses.
This article will show you how to make these edits to your expenses.
Mass Editing on the Purchases Page
Step 1: Login to your Tallie account and click the Purchases page.

Step 2: Click the specific expenses you'd like to edit, followed by the Pencil icon.
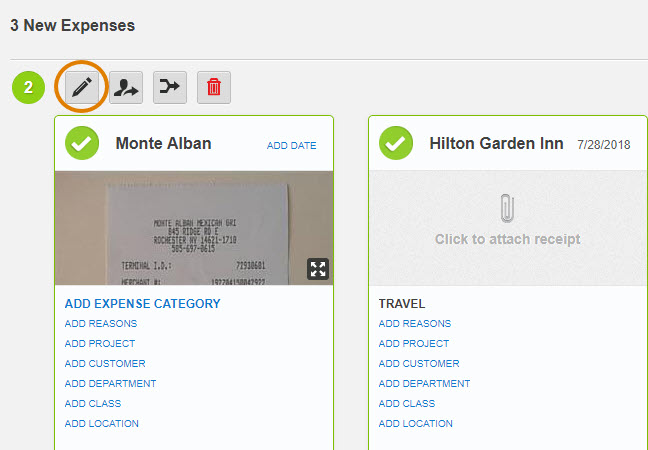
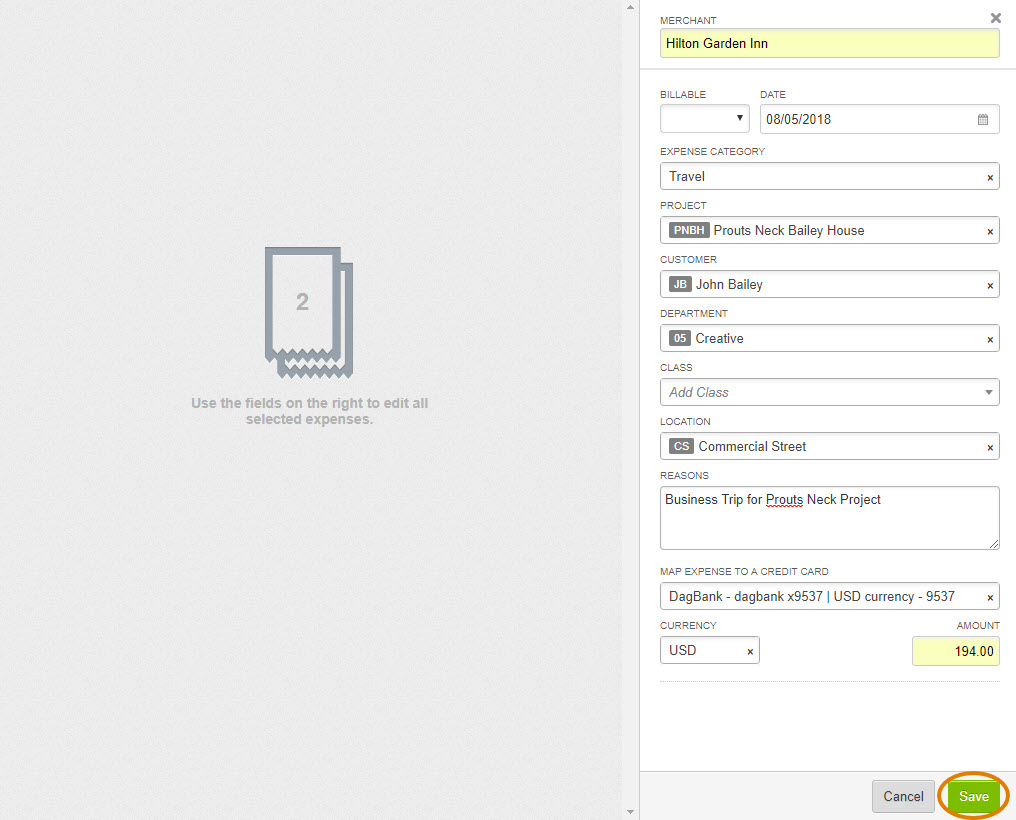
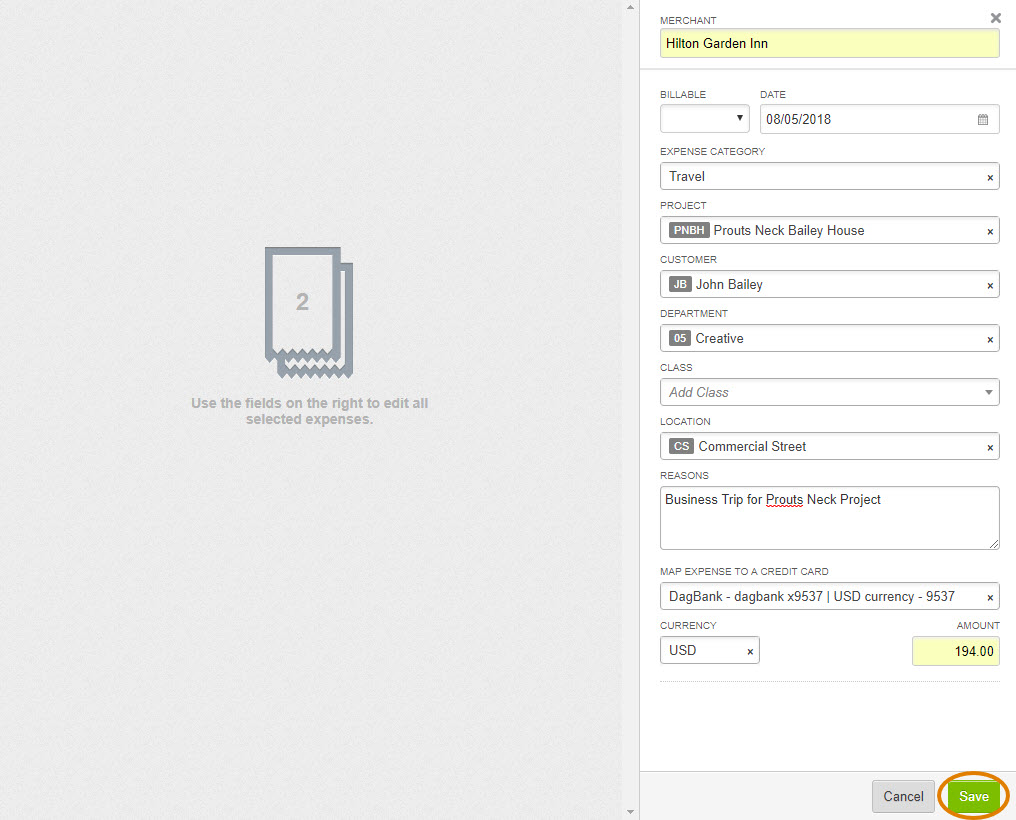
Step 3: From here, you'll be able to mass edit the expenses you selected. Any changes you make in this screen will be applied to both expenses. Click Save when complete.
Mass Editing on the Expense Reports Page
Step 1: Click the Expense Reports page, followed by the expense report you'd like to edit from.
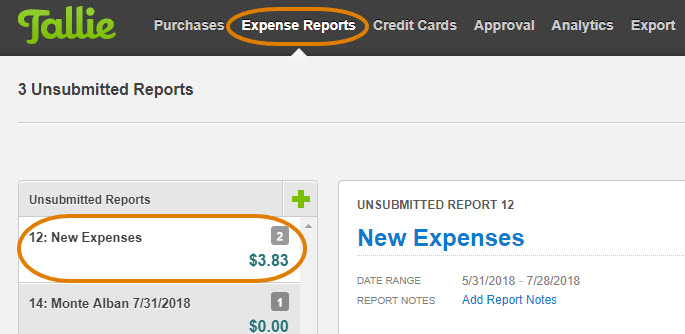
Step 2: Click the specific expenses you'd like to edit, followed by the Pencil icon.
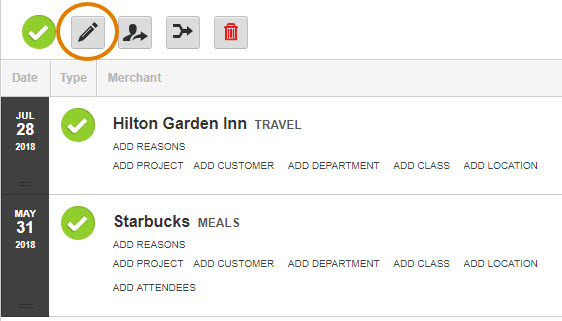
Step 3: From here, just like on the Purchases page, you'll be able to mass edit the expenses you selected. When complete, click Save.
Merging Transactions
Step 1: If Tallie recognizes similar information between two transactions, a Possible Duplicate flag may appear. See our article for steps on how to remove a possible duplicate flag by merging.
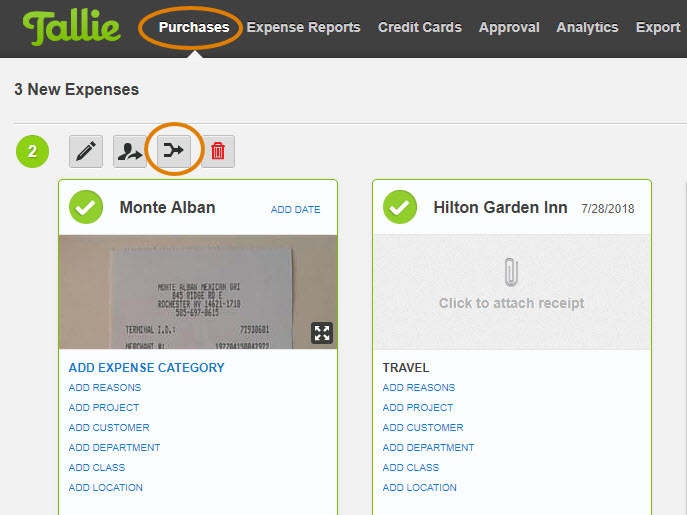
Step 2: Alternatively, on the Purchases page, click the specific expenses you'd like to merge, followed by the merge icon.
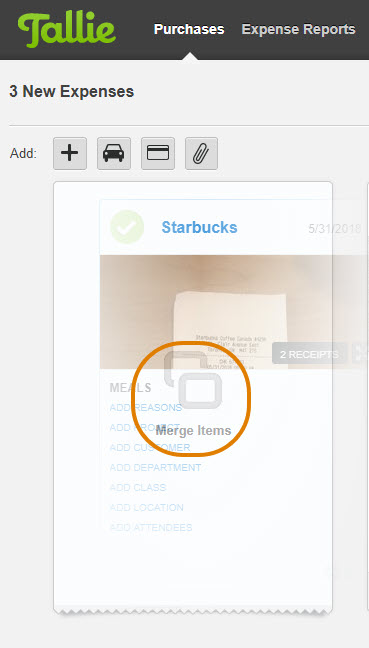
Step 3: You can also drag and drop one expense tile onto another to merge the two expenses.
Detaching Receipts
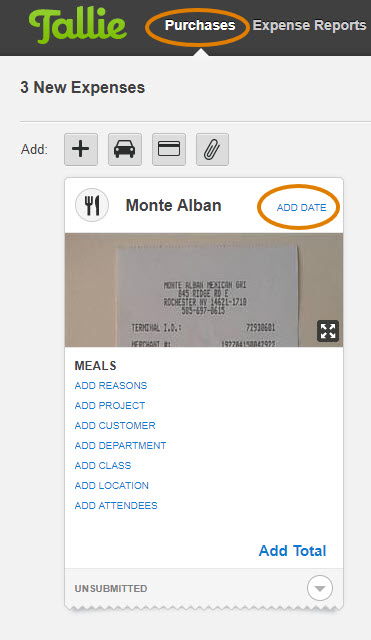
Step 1: On the Purchases page, click any field within an expense tile to begin editing the expense.
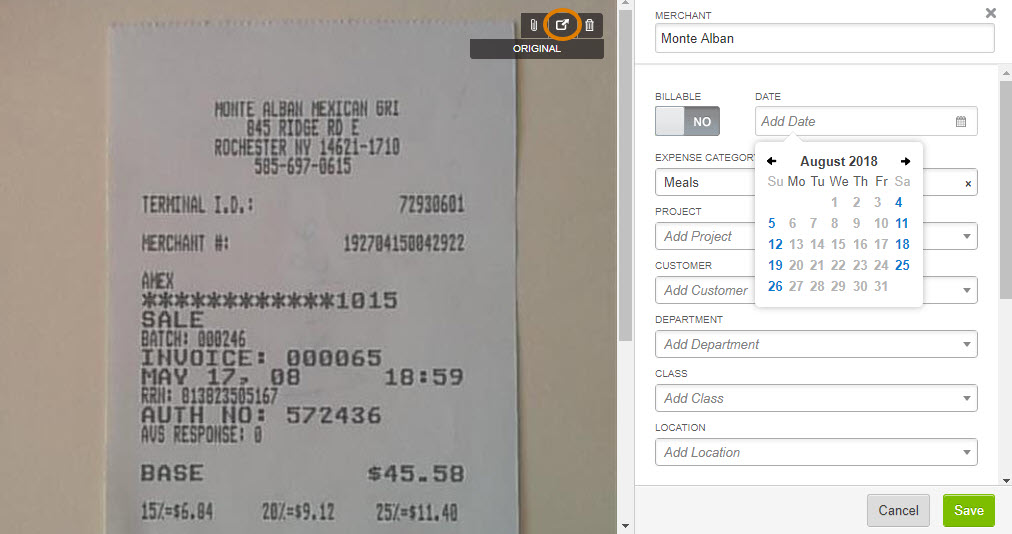
Step 2: From the editing screen, click Detach Receipt to detach.
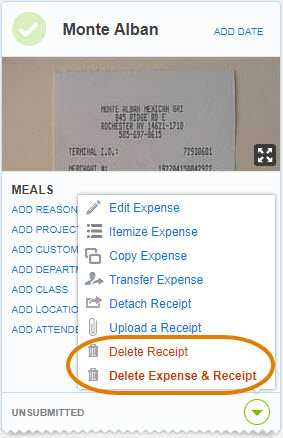
Step 3: Once detached, Tallie will create a new expense tile for the receipt. You can delete the receipt by hovering over the down arrow on the expense tile and clicking either Delete Receipt or Delete Expense & Receipt.
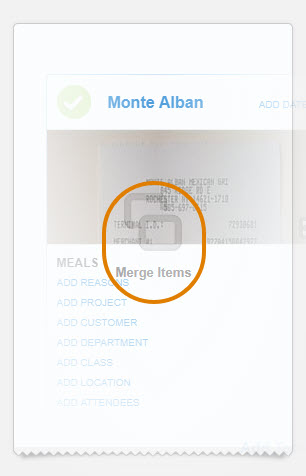
Step 4: You can also attach the receipt to a different expense by dragging and dropping it onto an existing expense tile.
Itemizing Transactions
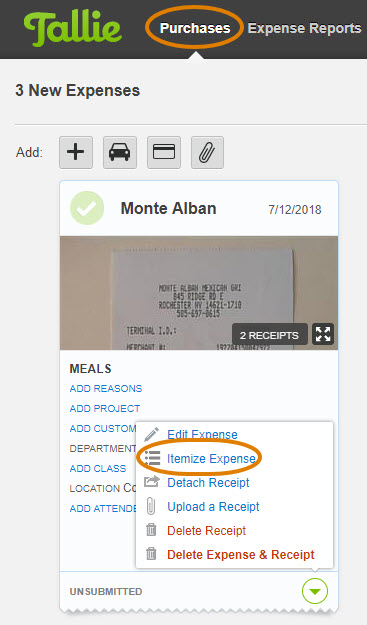
Step 1: On the Purchases page, begin by hovering over the down arrow on the expense you'd like to itemize, then click Itemize Expense.
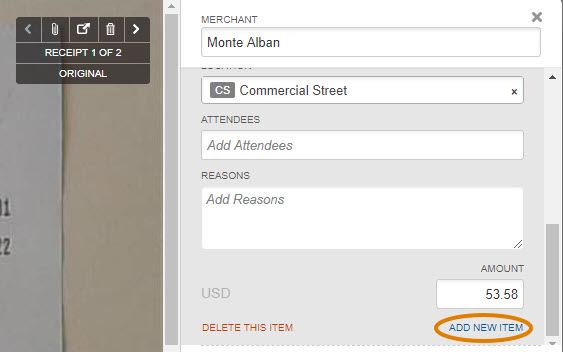
Step 2: The first item will be filled in with the amount of the full receipt. Click Add New Item to create the next itemized line and adjust the information.
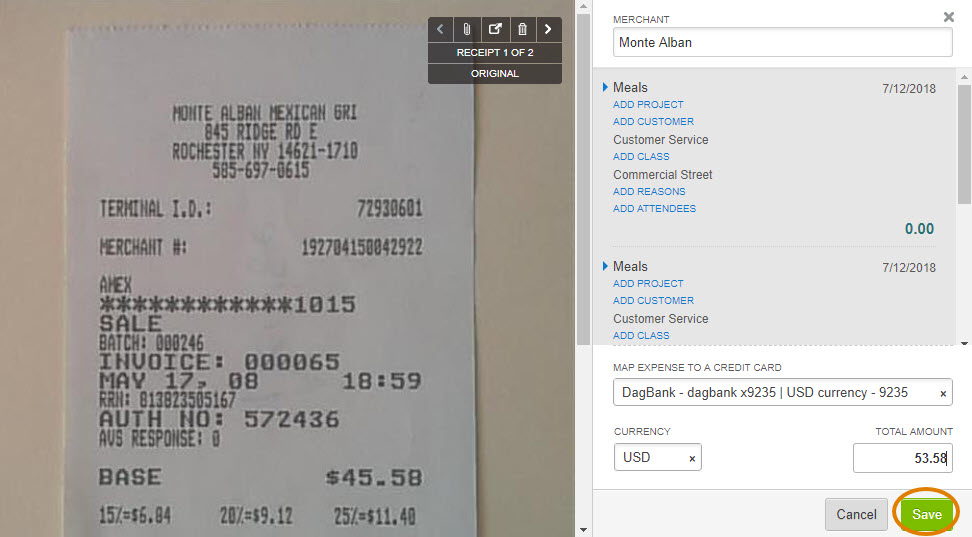
Step 3: From here you can edit the information in the new item as needed. You can also click Add New Item for another itemized line if necessary. When complete, click Save.
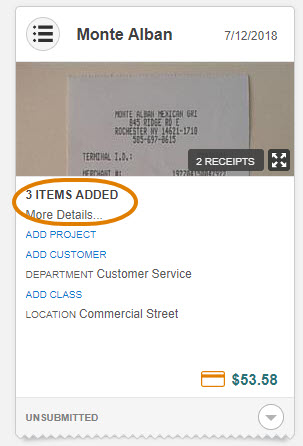
Step 4: The expense tile will now display the number of itemized lines within the receipt.
Copying Expenses
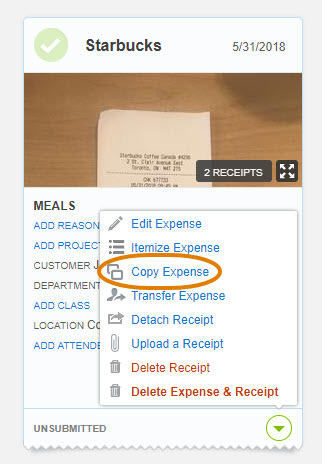
Step 1: From the Purchases page, hover over the down arrow in the specific expense you'd like to copy. Then, click Copy Expense.
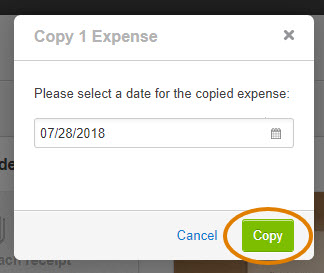
Step 2: A new screen will appear. Enter in the date for the copied expense, then click Copy.
Step 3: A new expense tile will now be created with all of the information from the copied expense but without the receipt. From here, you can upload a receipt and edit the information on the new expense.
